Painting ‘Happily Ever After’ – How to paint an ombre wall
4th Feb 2020
We believe in love just like you which is why we are going to show you just how to paint ‘Happily Ever After’ on a wall. It is called Ombre.
What is an Ombre wall?
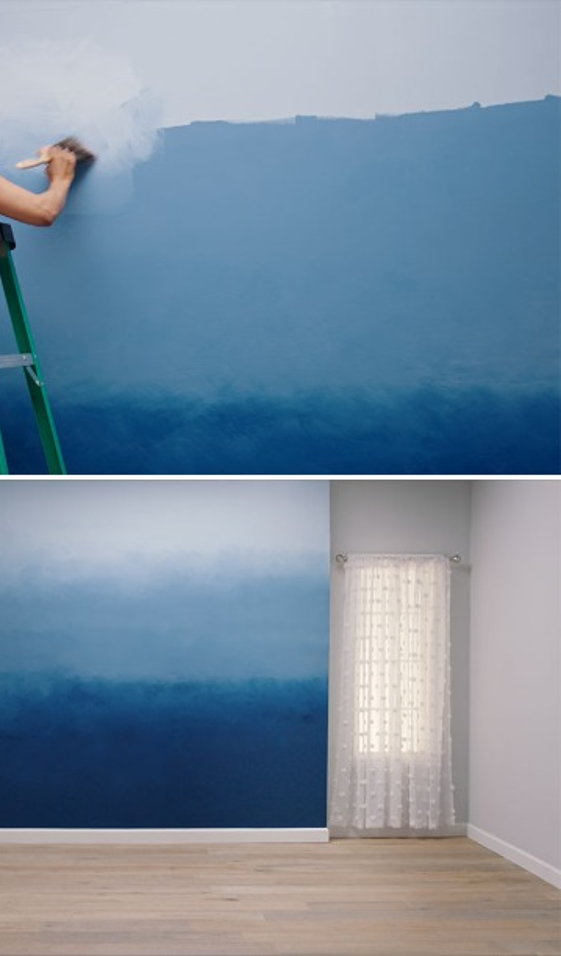
An ombre wall treatment begins with a single paint colour and slowly melts into another. Almost like a gradient. It creates a romantic, fantastical water colour effect on wall that is sure to make the Jones’ talk. It is not as difficult to achieve the desire ombre look on a wall. It is really just about blending the colours with a dry brush once you have applied them. Here is a quick and easy step by step. If in doubt, give us a shout at Head Office or ask one of the knowledgeable store team members to help you.
Whether you decide to select two contrasting shades to merge or two complementary colour, an ombre wall is surprisingly easy to do. Before you climb into your paint outfit, have a look at our Inspiration board here. We selected a couple of inspirational Ombre walls to get your creative juices flowing.
Tools you will need:
Primer Paint (We recommend Envirolite as it is non-toxic and not harmful for your health)
Measuring tape
Ladder
Measuring tape
Pencil
2 colour of paint. (Midas 300 is a range of colours available in all Paintsmiths stores)
3 trays
2 x large Paintsmiths or Hamiltons brushes, 1 smaller brush
Instructions (with credit to The Spruce for the steps)
Determine Your Colour Flow
Decide which way to direct the flow of colour. Transitioning from dark at the bottom to light at the top makes the ceiling seem higher and the space appear larger. Transitioning from light at the bottom to dark at the top can make a large room feel cosier. For this demonstration, the wall will go from darkest at the bottom to lightest at the top.
Prime the Wall
Cover the wall with an even coat of white primer, using a standard roller and paintbrush. If desired, tape off the baseboard and other trim before priming. Let the primer dry completely. Meanwhile, wash the roller, paintbrush, and tray and let them dry so they’re ready for the painting steps.
Section Your Wall
Divide the wall into three equal horizontal sections, using a measuring tape, a pencil, and a yardstick. Measure vertically and make light pencil marks for each section, then use the yardstick and pencil to draw light horizontal lines through the marks.
Cut In the Top and Bottom Edges
Paint around the base of your wall, using a small paintbrush and your dark shade of paint. Then, use your light shade of paint to cut in along the ceiling. Let the paint dry.
Mix the Paint
Set out three paint trays. Fill one tray with your dark colour and fill another tray with your light colour. Using a measuring cup and a bucket or recycled container (a large yogurt or cottage cheese container works great), mix a third colour by combining the two shades in equal parts, then stir thoroughly with a paint stir stick. Pour the mixed paint into the third paint tray.
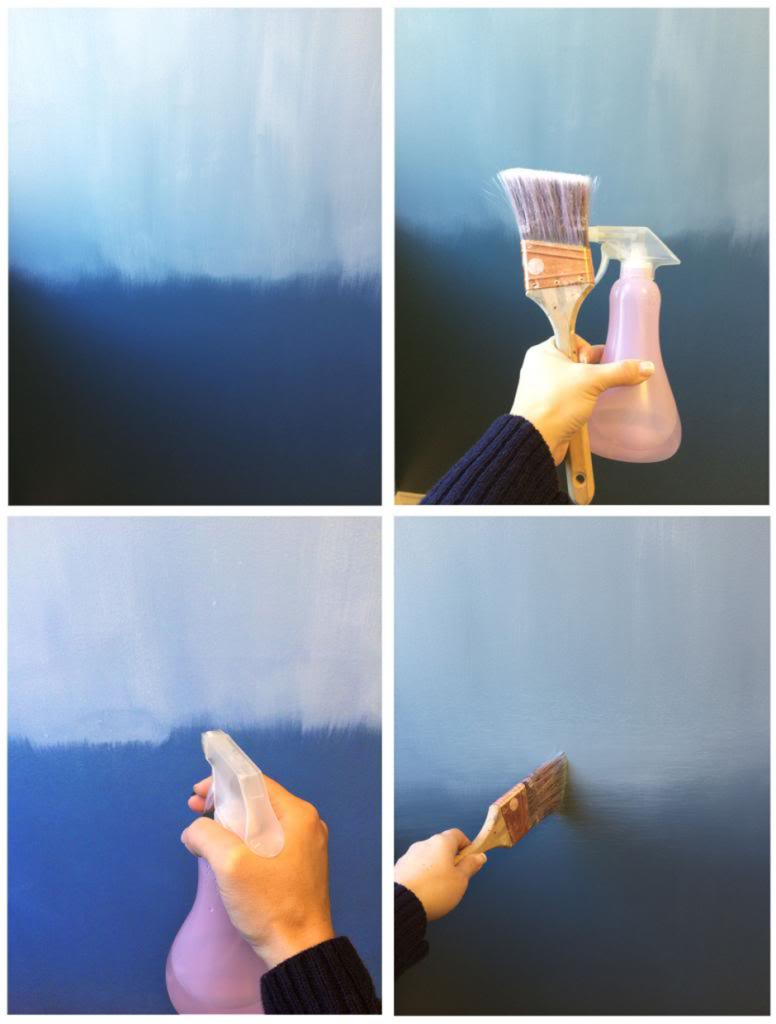
Roll Each Section
Roll the bottom section of the wall with the darkest shade, using a paint roller. Keep the edge of the paint about 1 inch below the lower horizontal pencil line. Without waiting for the paint to dry, immediately roll the middle section with the blended paint, then roll the top section with the lightest paint. Use a different roller for each colour. Keep each band of paint 1 inch from the marked lines, creating a 2-inch-wide strip of bare (primed) wall between the sections.
Blend the Sections
Use a large, dry paintbrush to blend the two colours between the bottom and middle sections, making crossing X strokes centred over the strip between the sections. Work quickly so that the paint does not dry. Immediately do the same to blend the middle and top sections, using a new dry brush. Blend as much or as little as you like but do it quickly so the paint does not dry before it is blended. When you’re done blending, let the paint dry completely.